APIs and Web Services: Background and an Example
About a year ago I familiarized myself with web-services and APIs (Application Program(ming) Interface) more generally to get a better understanding of the technological background. My conclusion back then was that the terms are used in various contexts and depending on the exact context, everyone seemed to have a vague idea about what they actually mean and stand for.
A First Explainer: Getting Some Intuition
In an introductory class about web development from Colt Steele which I had attended last year, he introduces APIs at some point in the course right after having moved from front-end technologies to back-end web development as follows: API’s are interfaces for code/computers to talk to one another.
He goes on to clarify that the term ‘API’ is actually a ‘broader term that refers to any type of code/interface that is made for other code to be used with/to communicated with’. Referring to the corresponding Wikipedia article, the definition of an API undermines the very broad/vague definition that Colt used to introduce APIs by stating that ‘[a]n application programming interface (API) is a set of routines, protocols, and tools for building software and applications.’ Hence, the term API comprises anything ranging from libraries, packages, modules to databases, web-APIs, etc.1
Commonly referred to as APIs today: web APIs
But what people nowadays typically mean they refer to APIs are web (application) APIs, which are, strictly speaking, only a subset of the much broader definition of APIs from above. It is only that web APIs have become so prevalent and common, that when people refer to an API they usually actually are referring to a web API, meaning any sort of generic interface to an application via the web.
Today a classical example where web APIs are exploited extensively are all kinds of travel search engines like Trivago, Expedia, Checkfelix, etc., that aggregate information from a number of other services via the corresponding web APIs and thereby make the respective data of the services whose web APIs they are consuming available on their platforms for customers to e.g., compare prices.
The above example already makes clear, that the way that applications get data from web APIs or access its interface is through the internet (or more precisely, via HTTP, the ‘Hypertext Transfer Protocol’ which is the foundation of data communication for the modern world wide web and functions as a request-response protocol in the client-server computing model).
Today almost all major (internet)-giants like Twitter, Facebook, Google (in their developers section; their most popular/interesting API being their Maps API), eBay, Yahoo, Amazon, etc. actively maintain dozens of various web-APIs that are all designed for specific purposes and audiences and have become part of these companies’ standard product range/deliverables.
Two Examples: Reddit’s API and Yahoo Weather
As an example and to distinguish a web API from a normal human-readable website, Colt refers to reddit.com/r/aww which represents a subreddit for cute photos in a human-readable format (which our browser appropriately renders for us to have a look at). In other words, the underlying data (of content in the route ‘/r/aww’) is embedded in HTML-structure of the page which we get back rendered when making an HTTP request to reddit.com/r/aww. But there is also the corresponding web API-version for code to interact with of exactly this ‘aww’ subreddit available under reddit.com/r/aww.json that strips away all the extra-clutter that comes along with the data (HTML, etc.).2 The base-bone data in JSON (Javascript Object Notation) format is easier for computers/code/applications to handle as compared to the human-readable version from before. Together with another very popular output-format called XML (eXtensible Markup Language), ‘JSON’ are the standard output-formats of HTTP requests to web APIs (so web APIs respond with data directly).
Another simple example is the Yahoo Weather API which allows to easily toggle between JSON and XML - responses and, e.g., refers you to the following end-point (URL) for a request for the sunset time in Hawaii in JSON - format (as an arbitrary example): Endpoint Sunset time Hawaii. The data that should be displayed in JSON-format is the following:
{
  query: {
    count: 1,
    created: "2018-03-23T21:26:22Z",
    lang: "de-DE",
    results: {
      channel: {
        astronomy: {
          sunset: "6:37 pm"
        }
      }
    }
  }
}
The corresponding output in XML-format would look as follows:
<query xmlns:yahoo="http://www.yahooapis.com/v1/base.rng" yahoo:count="1" yahoo:created="2018-03-23T21:28:07Z" yahoo:lang="de-DE">
  <results>
    <channel>
      <yweather:astronomy xmlns:yweather="http://xml.weather.yahoo.com/ns/rss/1.0" sunset="6:37 pm"/>
    </channel>
  </results>
</query>
<!--  total: 18  -->
Advantage of JSON and XML - formats
What makes the ‘raw’ data format returned from web APIs so attractive is that the response can, e.g., seamlessly be integrated into your own application/program. In such a scenario the HTTP-request to a certain endpoint of a web-API would therefore not be made via a browser but e.g., from within a program’s code (using certain packages that support HTTP-requests like urllib or httplib in Python, httr in R or request in NodeJS). Beyond that, there is also the possibility to fire HTTP-requests via the command-line using a tool called curl which ships with Macs by default but has to be installed on Windows machines. The bottom line is: browsers are not the only tools that can be used to make HTTP-requests to certain URLs (end-points).3
Web API vs. ‘regular websites’
After all of the above, we could be confused and think that regular websites and web APIs are two completely different technologies or we could concentrate on the similarities (i.e., the fact that they use the same HTTP protocol to fetch for data) and think that they are actually practically the same. Truth is, the difference between the two is actually negligible. What makes APIs stand out are the already discussed format they send data back (JSON or XML instead of HTML) and an accompanied syntax (usually explained in a dedicated documentation) that has to be used in order to retrieve/locate certain end-points according to one’s own needs.
Useful Websites
As an interesting (not so say funny) application of such web APIs, in his web-development class Colt mentions ifttt.com/recipes which is a service that enables you to make apps and devices to work together by exploiting the connection/concatenation of web APIs (that are supported on this platform).
Further, a great place that collects a comprehensive list of available web APIs (i.e., kind of like an API directory) is programmableweb.com.
A Second Explainer
In his book Web Scraping with Python (2015)4 which I recently read through some of the chapters, Ryan Mitchell introduces generic APIs as ‘[…] convenient interfaces between multiple disparate applications […]’ and that ‘[…] APIs are designed to serve as a lingua franca between different pieces of software that need to share information with each other’ (p. 49). Without going into much detail about what exactly is meant with this definition for a layman, web (application) APIs are introduced as what has been commonly understood in recent times when people refer to ‘APIs’ (exactly like we discussed in our first explainer above).
Mitchell goes on and lists a few simple ground rules that are common to almost all web APIs:
- Methods:
Information is requested via HTTP - requests whereby the four most commonly used ‘verbs’ are
GET, POST, PUT, DELETE. - Authentication: While there are many free API services, there are also many proprietary APIs that require some type of authentication before they can be used (e.g., Twitter).
- Responses: The most common types of response formatting are XML and JSON whereby in recent years JSON has become more and more popular. This can generally be attributed to (1) JSON files being generally smaller than their corresponding XML - counterparts and (2) that many backend frameworks used in web development nowadays use Javascript which natively integrates better with JSON - data.
Two must-reads that Mitchell refers to to get a more or less complete overview of both the theory and practice of modern APIs are RESTful Web APIs (2013) by Richardson, Ruby and Amundsen as well as as video series on Designing APIs for the Web by Amundsen.
A Third Explainer and Building Your Own Web-API
My third encounter with APIs was in Miguel Grinberg’s book Flask Web Development where he introduces APIs by mentioning that in recent years ‘there has been a trend in web applications to move more and more of the business logic to the client side, producing an architecturak styke that is known as Rich Internet Applications (RIA). In RIAs, the server’s main (and sometimes only) function is to provide client application with data retrieval and storage services.’ (p. 175) It is exactly in this setting that the server’s purposes reduces to becoming a web service or Application Programming Interface (API)5. That is, Grinberg uses the terms (web) APIs and web service interchangeably.
Mentioning the RPC (Remote Procedure Call) and SOAP (Simplified Object Access Protocols) that were the popular choices by which RIAs would communicate with a web service in the past years, Grinberg’s focus then shifts fully on the more recently emerged REST (Representational State Transfer) architecture for web services by exploiting and being built on the most powerful distributed computing system that we all know: the World Wide Web.
Referring to Roy Fielding’s dissertation which introduces the REST architecture for web services, Grinberg lists the six defining characteristics that make a web service RESTful:
- Client-Server: There must be a clear separation between the client and the server.
- Stateless: A client request must contain all the information that is necessary to carry out the request. The server must not store any state about the client that persists from one request to the next.
- Cache: Responses from the server can be labeled as cacheable or non-cacheable so that clients (or intermediaries between clients and servers) can use a cache for optimization purposes.
- Uniform Interface: The protocol by which clients access server resources must be consistent, well defined, and standardized. Hence, the commonly used uniform interface of REST web services is the HTTP protocol.
- Layered System: Proxy servers, caches, or gateways can be inserted between clients and servers as necessary to improve performance, reliability, and scalability.
- Code-on-Demand: Clients can optionally download code from the server to execute in their context.
Before showing the reading how to actually build a web API, Grinberg mentions three additional concepts:
-
Resources Are Everything: Resources are considered the core to the REST architectural style which are nothing else then items of interest in the domain of the application (if you, e.g., consider a blogging application then resources would be users, blog posts, comments, etc.).
Thereby each resource must have a unique URL by which it is represented (staying with the blogging example, a blog post could be represented by the URL/api/posts/123345where12345is a unique identifier for a post such as the post’s database primary key). -
Request Methods: While client applications send requests to a server using the corresponding URL, the request method indicates the desired operation. And because REST APIs use the HTTP-protocol that we are so well aware of, the respective HTTP-verbs are being exploited (i.e., the above mentioned
GET, POST, PUT, DELETEto name only the most frequently used). Thereby the REST architecture does not require that all methods be implemented for a resource. An un-implemented request method would result in the client receiving a 405 status code as a response. -
Request and Response Bodies: Resources are sent back and forth between client and server in the bodies of requests and responses, but REST does not specify the format to use to encode resources. As already mentioned multiple times, the two formats commonly used with RESTful web services are JSON and XML whereby for web-based RIAS, JSON is more attractive/userful because of its usefulness in the context of Javascript. An additional interesting aspect mentioned by Grinberg is that in a well-designed RESTful API, the client just knows a short list of top-level resource URLs and then discovers the rest from links included in the response, similar to how we can discover new web pages by simply browsing the Web by clicking on links that we stumble upon.
Building a Web-API
While in his book Flask Web Development, Grinberg guides the reader through the process of exposing the already implemented blogging platform by using the familiar route() decorator along with its methods argument to declare the routes that would handle the resource URLs exposed by the web service, in another blog post Grinberg goes through a very simple ad-hoc example of how to easily create a web service that would adhere to the REST architecture by means of just a few lines of code.
The below example does not claim to be a complete tutorial of how to create a full-fledged RESTful API and is not backed by a proper database. It simply outlines some design aspects which in the case of a web service that adheres to the REST guidelines simply becomes an exercise in identifying the resources that will be exposed and how they will be affected by the different request methods.
The example that Gringberg outlines is a simple ‘To Do List’ application whereby the only resource that will be exposed by this service are tasks. This tasks resource will use HTTP methods as follows:
| HTTP Method | URI | Action |
|---|---|---|
| GET | http://[hostname]/todo/api/v1.0/tasks | Retrieve list of tasks |
| GET | http://[hostname]/todo/api/v1.0/tasks/[task_id] | Retrieve a task |
| POST | http://[hostname]/todo/api/v1.0/tasks | Create a new task |
| DELETE | http://[hostname]/todo/api/v1.0/tasks/[task_id] | Delete a task |
In addition, a task as defined as having the following fields:
- id: unique identifier for tasks (numeric)
- title: short description of task (string)
- description: long task description (text)
- done: state of task completion (boolean)
Assuming that you have had a basic exposure to Python including the powerful Flask web development framework and working with virtual environments, switch to your command-line and run the following commands that create a root directory createRESTfulAPI, create a virtual environment within that root directory, activate that virtual environment, install flask using pip and create an additional folder app which will hold our application:
$ mkdir createRESTfulAPI
$ cd createRESTfulAPI
$ virtualenv virtual
New python executable in ...............................
Also creating executable in ............................
Installing setuptools, pip, wheel...done.
$ source virtual/bin/activate
$ pip install flask
$ mkdir app
$ cd app
Having installed flask, a simple web application can be created by just a few lines of code that are which we will put in a file called app.py:
from flask import Flask

app = Flask(__name__)

@app.route('/')
def index():
    return "Hello, World!"

if __name__ == '__main__':
    app.run(debug=True)
Let us briefly disentangle what all of the above code is actually doing (for a more comprehensive review of the basics to get started with flask, see the quickstart manual) (note that for the below it helps at least to have an intuition about Object-Oriented Programming (OOP) in Python):
from flask import Flaskimports theFlaskclass; an instance of this class will be our WSGI application- then we create an instance of this class with
app = Flask(__name__)whereby the first argument is the name of the application’s module or package. If we are using a single module (as in this example), we should use__name__because depending on if it’s started as application or imported as module the name will be different (__main__versus the actual import name) - then we use the
route()decorator in@app.route('/')to tell Flask what URL should trigger our function - the function is given a name which is also used to generate URLs for that particular function and then returns the message we want to display in the user’s browser
- with the line
if __name__ == '__main__': app.run(debug=True), we start the debugger when starting the application
Now, to run this application, simply execute python3 app.py in your command-line, switch to your web-browser and type http://localhost:5000 to see your application already in action (note that in my case I have to execute python3 because for my system python is assigned to python 2; in your case simply running python might run already python3).6
As mentioned above, the proper way to install our web service would be to have it backed by a proper database. But because the tutorial is not about databases, Miguel continues the implementation of the web service by means of a simple memory structure (which will only work if the web server that runs the application in the end is single process and single threaded which is okay for Flask’s own development server but would not be recommended for a real production web server).
To implement the first entry point of our web service, we update the above flask - application by removing the index entry point, adding a list of dictionaries called tasks which contains the four fields which we have defined above and correspondingly create the ‘route’ (the entry-point) from which all the tasks are retrievable via a GET request:
from flask import Flask, jsonify

app = Flask(__name__)

tasks = [
    {
        'id': 1,
        'title': u'Buy groceries',
        'description': u'Milk, Cheese, Pizza, Fruit, Tylenol',
        'done': False
    },
    {
        'id': 2,
        'title': u'Learn Python',
        'description': u'Need to find a good Python tutorial on the web',
        'done': False
    }
]

@app.route('/todo/api/v1.0/tasks', methods=['GET'])
def get_tasks():
    return jsonify({'tasks': tasks})

if __name__ == '__main__':
    app.run(debug=True)
The implemented get_tasks function is associated with the implemented URI /todo/api/v1.0/tasks and responds with our tasks data in JSON format (note the import of jsonify from flask in the header of our script and the line return jsonify({'tasks': tasks}) that transforms the list of dictionaries into a JSON structure.)
By running the application on a local server (for this again type python3 app.py into your command-line7) and typing http://localhost:5000/todo/api/v1.0/tasks into your browser should show you the following JSON output:
{
  tasks: [
    {
      description: "Milk, Cheese, Pizza, Fruit, Tylenol",
      done: false,
      "id": 1,
      title: "Buy groceries"
    },
    {
      description: "Need to find a good Python tutorial on the web",
      done: false,
      "id": 2,
      title: "Learn Python"
    }
  ]
}
Above we have already discussed that web browsers are not the only means to issue HTTP - requests. Similarly, here we actually want to either use the curl - command to issue the HTTP GET - request from the command-line or use a tool like Postman which is specifically designed for API development.
If we try to access your end-point with the curl - command via the command line, your output should like similar to the following:
$ curl -i http://localhost:5000/todo/api/v1.0/tasks
HTTP/1.0 200 OK
Content-Type: application/json
Content-Length: 294
Server: Werkzeug/0.14.1 Python/3.6.4
Date: Sat, 24 Mar 2018 14:46:55 GMT

{
  "tasks": [
    {
      "description": "Milk, Cheese, Pizza, Fruit, Tylenol",
      "done": false,
      "id": 1,
      "title": "Buy groceries"
    },
    {
      "description": "Need to find a good Python tutorial on the web",
      "done": false,
      "id": 2,
      "title": "Learn Python"
    }
  ]
}
Voila - we just accessed the first end-point of our web service! Note that the part -i (which is called a ‘flag’, ‘option’, ‘argument’ or ‘parameter’ in command line jargon) stands for --include and makes the HTTP response to include the header in the output (the header can include things like server name, cookies, date of the document, etc.). For an comprehensive overview of available options for the curl tool refer to the following website.
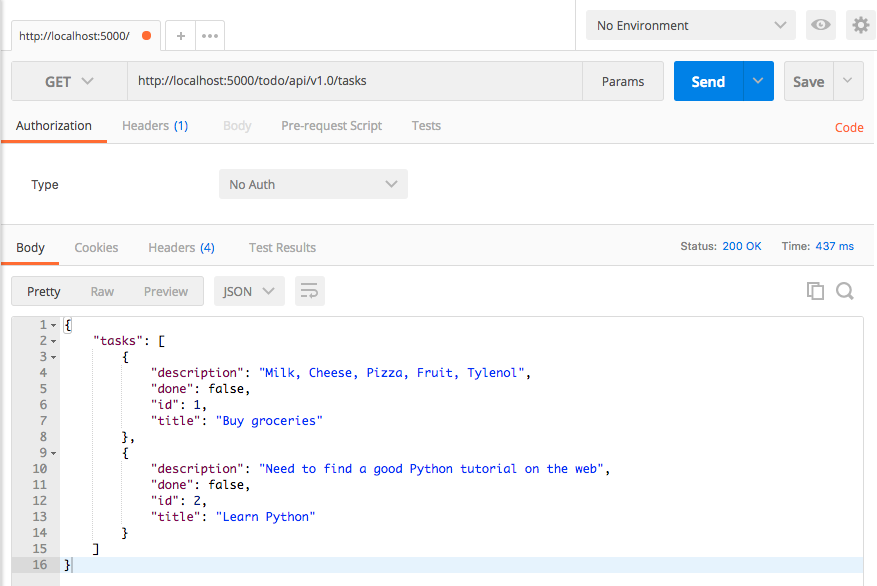
When ran through Postman, the response looks exactly the same:
Next, we turn to extending our web service by adding an additional GET method for our tasks resource that will be used to return the data of a single task. For the corresponding get_task() - function which is associated with the URI /todo/api/v1.0/tasks/<int:task_id>, we add an additional check to see if the id that we are handing over the HTTP request actually exists in our database (for this we have to import the abort object of the flask library ). The corresponding code looks as follows:
from flask import abort

@app.route('/todo/api/v1.0/tasks/<int:task_id>', methods=['GET'])
def get_task(task_id):
    task = [task for task in tasks if task['id'] == task_id]
    if len(task) == 0:
        abort(404)
    return jsonify({'task': task[0]})
Let us briefly disentangle the code and take a closer look in particular at the part task = [task for task in tasks if task['id'] == task_id]. The concept being applied here is a so-called list comprehension. List comprehensions are a very concise way to produce lists in python which can be very intuitive once you get the hang of them but can be a bit intimidating at the beginning. What proves especially useful is to rewrite a list comprehension as a for loop or a lambda function (which is another way to create lists in Python which we, however, will not investigate any further).
To briefly recap: Lists are one of the four built-in data structures in Python (besides tuples, dictionaries and sets). Like in R is a compound data type, meaning that the values stored in the list don’t need to be of the same type. They are simply an ordered collection of items or objects which can be iterated.
The single best way to think about list comprehensions is to think of how we describe sets, tuples or vectors in Math:
S = {x^2: x in {0 ... 9}}
V = (2^x: x in {0, ..., 12})
In Python, list comprehensions are constructed as follows: list_variable = [x for x in iterable]. The direct translation of this into the above examples of the sets Sand V would mean:
S = [x**2 for x in range(10)]
S
[0, 1, 4, 9, 16, 25, 36, 49, 64, 81]

V = [2**i for i in range(13)]
V
[1, 2, 4, 8, 16, 32, 64, 128, 256, 512, 1024, 2048, 4096]
We see that the syntax of list comprehensions in Python is very similar to the mathematical defintions of the sets we have described above. Overall, list comprehensions are very powerful because they can be a complete substitue to for loops, lambda functions and the functions map(), filter()and reduce().
Now, if we want we can even add conditionals to the list comprehensions. If, e.g., in the set S from above we would only like to get even numbers, we could write:
S = [x**2 for x in range(10) if x%2==0]
S
[0, 4, 16, 36, 64]
Coming back to our implementation of the new route, we see that we get the id of the task in the URL which is then handed over as the argument task_id to the route’s associated function get_task(task_id) (not to be confused with get_tasks() from our first route from above). With the argument task_id we search in our tasks array and if the id in our request does not exist in our in memory database (i.e., len(task) == 0), we return error code 404 which, according to the HTTP specification, stands for “Resource Not Found”. If, on the other hand, we find a corresponding task in our database, we again package it as JSON using jsonify and send it as a response. Start the local server again via python3 app.py and switch to the command-line to execute an HTTP request using curl as follows:
$ curl -i http://localhost:5000/todo/api/v1.0/tasks/2
HTTP/1.0 200 OK
Content-Type: application/json
Content-Length: 152
Server: Werkzeug/0.14.1 Python/3.6.4
Date: Sat, 24 Mar 2018 22:05:30 GMT

{
  "task": {
    "description": "Need to find a good Python tutorial on the web",
    "done": false,
    "id": 2,
    "title": "Learn Python"
  }
}
Requesting a non-existent tasks give us the following response:
$ curl -i http://localhost:5000/todo/api/v1.0/tasks/3
HTTP/1.0 404 NOT FOUND
Content-Type: text/html
Content-Length: 233
Server: Werkzeug/0.14.1 Python/3.6.4
Date: Sat, 24 Mar 2018 22:07:55 GMT

<!DOCTYPE HTML PUBLIC "-//W3C//DTD HTML 3.2 Final//EN">
<title>404 Not Found</title>
<h1>Not Found</h1>
<p>The requested URL was not found on the server.  If you entered the URL manually please check your spelling and try again.</p>
Querying for resource id #2 gave us the expected result. However, querying for task_id == 3 returned an HTML message instead of JSON because this is how Flask generates the 404 response by default. If ran through the browser, the returned web page would look as follows:

To also respond with JSON in the event of a 404 error, we slightly tweak our 404 error handler:
from flask import make_response

@app.errorhandler(404)
def not_found(error):
    return make_response(jsonify({'error': 'Not found'}), 404)
After this, the printed response in our command-line looks much better:
$ curl -i http://localhost:5000/todo/api/v1.0/tasks/3
HTTP/1.0 404 NOT FOUND
Content-Type: application/json
Content-Length: 27
Server: Werkzeug/0.14.1 Python/3.6.4
Date: Sat, 24 Mar 2018 22:15:57 GMT

{
  "error": "Not found"
}
We continue with the implementation of a POST method to be able to add a new item to our task database. For this we need the request object from the flask library. Note how we switched the methods attribute from GET to POST:
from flask import request

@app.route('/todo/api/v1.0/tasks', methods=['POST'])
def create_task():
    if not request.json or not 'title' in request.json:
        abort(400)
    task = {
        'id': tasks[-1]['id'] + 1,
        'title': request.json['title'],
        'description': request.json.get('description', ""),
        'done': False
    }
    tasks.append(task)
    return jsonify({'task': task}), 201
The following aspects are worth noting:
- in Flask, data a client sends to the server is provided by the global
requestobject request.jsonwill contain the posted data only if it came marked as JSON- if the data is not there or is missing a
titleitem, we return error code 400 (bad request) - if the posted data is accepted as JSON, we create a new task dictionary using the id of the last task plus one via
'id': tasks[-1]['id'] + 1. The construction takes the last task dictionary in our list of task dictionaries (tasks[-1]) and then extracts theidfrom this last task dictionary by extracting the correspondingvaluebelonging to the keyid(note that dictionaries in python are so-called key-value pairs.) So if our task dictionary contains e.g., two tasks,tasks[-1]['id']will evalute to2, hence'id': tasks[-1]['id'] + 1will make'id'to evalute to3. - in order to hand over the data as JSON we have to set the request content type to
application/jsonwhen firing thePOSTrequest via the command line - we assume the
donefield to always start asFalse - the
descriptionfield is optional and does not have to be delivered in thePOSTrequest - after adding the newly created task (via
tasks.append(task))to our list of tasks (ourtasksarray), we respond to the client with the added task like above including a status code 201 which according to HTTP stands for “Created”
Launching our web service with python3 app.py and jumping over to our command line to test the newly implemented functionality results in the following:
$ curl -i -H "Content-Type: application/json" -X POST -d '{"title":"Read a book"}' http://localhost:5000/todo/api/v1.0/tasks
HTTP/1.0 201 CREATED
Content-Type: application/json
Content-Length: 105
Server: Werkzeug/0.14.1 Python/3.6.4
Date: Sat, 24 Mar 2018 23:18:39 GMT

{
  "task": {
    "description": "",
    "done": false,
    "id": 3,
    "title": "Read a book"
  }
}
The above command suddenly comes along with a bunch of additional parameters. Let us review them in turn:
-iwas already clarified above and includes the header into an HTTP request-His used to include any number of extra headers into an HTTP request; and because ‘Content-Type’ is the name of one of the internal headers thatcurlwould use (usually set to text/html by default), by setting it explicitly as a custom header, this externally set header will be used instead of the internal one.-Xspecified a custom request method to use when communicating with an HTTP server; the specified request method will be sued instead of the method otherwise used (which defaults to GET)-dsend the specified data in a POST request to the HTTP server in the same way that a browser does when a user has filled in an HTML form and presses the submit button; this will causecurlto pass the data to the server using the content-type application/x-www-form-urlencoded.
After adding this new task to our in-memory database, we can retrieve the list of all tasks including the new one:
$ curl -i http://localhost:5000/todo/api/v1.0/tasks
HTTP/1.0 200 OK
Content-Type: application/json
Content-Length: 424
Server: Werkzeug/0.14.1 Python/3.6.4
Date: Sat, 24 Mar 2018 23:20:13 GMT

{
  "tasks": [
    {
      "description": "Milk, Cheese, Pizza, Fruit, Tylenol",
      "done": false,
      "id": 1,
      "title": "Buy groceries"
    },
    {
      "description": "Need to find a good Python tutorial on the web",
      "done": false,
      "id": 2,
      "title": "Learn Python"
    },
    {
      "description": "",
      "done": false,
      "id": 3,
      "title": "Read a book"
    }
  ]
}
The very last route we are going to implement is the DELETErequest:
@app.route('/todo/api/v1.0/tasks/<int:task_id>', methods=['DELETE'])
def delete_task(task_id):
    task = [task for task in tasks if task['id'] == task_id]
    if len(task) == 0:
        abort(404)
    tasks.remove(task[0])
    return jsonify({'result': True})
Again, like in the case for the POSTrequest we perform the list comprehension task = [task for task in tasks if task['id'] == task_id]. If the task to be deleted indeed exists in the tasks array, the variable task
To explain the line tasks.remove(task[0]) a little bit better, let us assume that the user wants to delete the first task in our database (our in-memory array). Then we would set <int:task_id> equal to 1 in the DELETE request and the function associated with this route (i.e., delete_task) will first run the list comprehension to end up with the variable task which is itself a list and in our example would only contain one single list item, namely [{'id': 1, 'title': 'Buy groceries', 'description': 'Milk, Cheese, Pizza, Fruit, Tylenol', 'done': False}].
task[0] accordingly selects the first item of our list task which only consists of that one element, i.e., task[0] returns the dictionary which corresponds to the first list element in task. tasks.remove(task[0]) then removes exactly the dictionary we want to remove from the tasks array which contains all currently stored tasks.
To test the newly created route, we run a DELETE - request via our command line to delete task #2:
$ curl -i -X DELETE http://localhost:5000/todo/api/v1.0/tasks/2
HTTP/1.0 200 OK
Content-Type: application/json
Content-Length: 21
Server: Werkzeug/0.14.1 Python/3.6.4
Date: Sun, 25 Mar 2018 11:34:32 GMT

{
  "result": true
}
Our new tasks array then looks as follows:
$ curl -i http://localhost:5000/todo/api/v1.0/tasks
HTTP/1.0 200 OK
Content-Type: application/json
Content-Length: 163
Server: Werkzeug/0.14.1 Python/3.6.4
Date: Sun, 25 Mar 2018 11:36:28 GMT

{
  "tasks": [
    {
      "description": "Milk, Cheese, Pizza, Fruit, Tylenol",
      "done": false,
      "id": 1,
      "title": "Buy groceries"
    }
  ]
}
Small Improvements
Our home-made web service is actually fully functional by now but there are two additional improvements we want to add which also Miguel Grinberg has included in his original blog post.
First, the problem with the current design of the web API is that we assume clients to know how the respective URIs are built (in practice this is also usually the case since all major web APIs come along with ample documentation). But there is another drawback: If we would want to apply any changes to these URIs in the future, we first would have to update relevant documentation, educate users, etc. Therefore it is easier if we return the full URIs that control a task (instead of only the task ids) so that clients always get the URIs ready to be used along with their requests. For this, we add a small helper function that generates a “public” version of a task that will be sent to the client along with a request:
from flask import url_for

def make_public_task(task):
    new_task = {}
    for field in task:
        if field == 'id':
            new_task['uri'] = url_for('get_task', task_id=task['id'], _external=True)
        else:
            new_task[field] = task[field]
    return new_task
Let us explain what the above function make_public_task is doing:
If we quickly start a python session in our shell (by executing python3 in our command line window and then create our tasks array, we can just pick one task out of the tasks array (our list of dictionaries) with which we have been working so far and assign it to the variable task1 as shown below:
$ python3
Python 3.6.4 (v3.6.4:d48ecebad5, Dec 18 2017, 21:07:28)
[GCC 4.2.1 (Apple Inc. build 5666) (dot 3)] on darwin

Type "help", "copyright", "credits" or "license" for more information.
>>>
>>> tasks = [
...     {
...         'id': 1,
...         'title': u'Buy groceries',
...         'description': u'Milk, Cheese, Pizza, Fruit, Tylenol',
...         'done': False
...     },
...     {
...         'id': 2,
...         'title': u'Learn Python',
...         'description': u'Need to find a good Python tutorial on the web',
...         'done': False
...     }
... ]
>>> tasks[0]
{'id': 1, 'title': 'Buy groceries', 'description': 'Milk, Cheese, Pizza, Fruit, Tylenol', 'done': False}
>>> task1 = tasks[0]
Next, we create an empty dictionary called new_task and then iterate through all keys of the task1 dictionary (which represents one single task). If the current key is not id, we simply add the current key-value pair to our newly created dictionary new_task. However, if the current key we are looking at is the id, we create an entry in our dictionary with the key uri instead and the corresponding value equal to the respective tasks URI.
If we were to perform the above description manually for one task, we would have the following:
>>> new_task = {}
>>> new_task['title'] = task1['title']
>>> new_task['done'] = task1['done']
>>> new_task['description'] = task1['description']
>>> new_task
{'title': 'Buy groceries', 'done': False, 'description': 'Milk, Cheese, Pizza, Fruit, Tylenol'}
For the key id as described above, instead we want to generate the URI which we do by using Flasks url_for - function. How does that work?
Remembering that the route() decorator in flask is used to bind a function to a URL, the url_for() command generates the URI which is associated with a particular function. In our case, the URI we want to create is the URI associated with the function get_task(task_id) which we have defined above. But because we cannot generate a URL without the application actually running, I will only write down the code that will generate exactly what we want (namely the associated value belonging to the key uri): new_task['uri'] = url_for('get_task', task_id=task['id'], _external=True)
Having disentangled the newly created function, we can then pass the list of tasks through this newly created function before sending them to the client by slightly changing the very first route which we have implemented (again pay attention to the list comprehension used):
@app.route('/todo/api/v1.0/tasks', methods=['GET'])
def get_tasks():
    return jsonify({'tasks': [make_public_task(task) for task in tasks]})
So now if we want to get a list of all tasks we would get the following:
$ curl -i http://localhost:5000/todo/api/v1.0/tasks
HTTP/1.0 200 OK
Content-Type: application/json
Content-Length: 407
Server: Werkzeug/0.14.1 Python/3.6.4
Date: Sun, 25 Mar 2018 14:41:25 GMT

{
  "tasks": [
    {
      "description": "Milk, Cheese, Pizza, Fruit, Tylenol",
      "done": false,
      "title": "Buy groceries",
      "uri": "http://localhost:5000/todo/api/v1.0/tasks/1"
    },
    {
      "description": "Need to find a good Python tutorial on the web",
      "done": false,
      "title": "Learn Python",
      "uri": "http://localhost:5000/todo/api/v1.0/tasks/2"
    }
  ]
}
We should apply this technique to all other functions to ensure that the client always also sees the URIs instead of the ids (not shown here).
The very last piece we want to implement following Grinberg’s post is to secure our web service with an authentication. by requiring clients to provide a username and password.
Usually in web applications where we would have a login form that sends the credentials to the server which then creates a session for the logged in user would violate the stateless requirement of REST. Therefore, instead we have to ask clients to send their authentication information with every request they send to us.
and because with REST we always try to adhere to the HTTP protocol as much as we can, we can make use of the Flask extension Flask-HTTPAuth which allows us to secure our web API. For this, we first have to install the extension with
$ pip install flask-httpauthand then import the HTTPBasicAuth object into our script app.py, instantiate an instance of the HTTPBasicAuth object and then implement the two callback functions get_password and error_handler (obviously you have to replace your_password and your_username with your own credentials of choice):
from flask_httpauth import HTTPBasicAuth
auth = HTTPBasicAuth()

@auth.get_password
def get_password(username):
    if username == 'your_username':
        return 'your_password'
    return None

@auth.error_handler
def unauthorized():
    return make_response(jsonify({'error': 'Unauthorized access'}), 401)
The callback function get_password is used by the extension to obtain the password for a given user (in the case of an application backed by a database, we would check the user’s table).
The function error_handler will be used by the extension in case an unauthorized client tries to access the service. Like we did with other custom error messages, we make sure that it contains JSON instead of HTML.
Having implemented the above, the only thing left is to indicate all the functions that need to be protected by adding the @auth.login_required at the respective positions in the code.For our GET request that returns all tasks at once, this would look as follows:
@app.route('/todo/api/v1.0/tasks', methods=['GET'])
@auth.login_required
def get_tasks():
    return jsonify({'tasks': [make_public_task(task) for task in tasks]})
If we would now request all tasks without authentication we would get the following output printed to our command line:
$ curl -i http://localhost:5000/todo/api/v1.0/tasks
HTTP/1.0 401 UNAUTHORIZED
Content-Type: application/json
WWW-Authenticate: Basic realm="Authentication Required"
Content-Length: 37
Server: Werkzeug/0.14.1 Python/3.6.4
Date: Sun, 25 Mar 2018 15:41:33 GMT

{
  "error": "Unauthorized access"
}
If we, however, hand our credentials over to the request, we get the full response as expected:
$ curl -u your_username:your_password http://localhost:5000/todo/api/v1.0/tasks
{
  "tasks": [
    {
      "description": "Milk, Cheese, Pizza, Fruit, Tylenol",
      "done": false,
      "title": "Buy groceries",
      "uri": "http://localhost:5000/todo/api/v1.0/tasks/1"
    },
    {
      "description": "Need to find a good Python tutorial on the web",
      "done": false,
      "title": "Learn Python",
      "uri": "http://localhost:5000/todo/api/v1.0/tasks/2"
    }
  ]
}
Note that we changed the flag -i to -u which is the necessary flag to be able to specify user name and password to use for server authentication right after the flag. If we would only specify the user name, curl would prompt for a password.
Having successfully replicated Miguel’s amazing post], there is time to briefly about possible improvements that Miguel himself suggested:
- A real web service should be backed by a real databases. So at some point we should get rid of the in memory structure and apply a MySQL or PostgreSQL database.
- Our web service could be extended to be able to handle multiple users and correspondingly maintain multiple lists. In such a system we would have a second resource which would be the users.
- The implemented
GETrequest for the entire task list could be extended with a filter functionality.
Deployment to a real web server
Being able to run our little web service on a local server, we want to add one more piece to the story by deploying it to a real web server via ‘Heroku’ so that we can ask a friend to access our web service as well.
In order to do this we assume (1) that you are vaguely familiar with ‘git’ and (2) the deployment process using ‘heroku’. This means that you have to have (1) ‘git’ installed on your machine and (2) that you have to have at least a free account on heroku.com as well as the Heroku Command Line Interface (CLI) installed.
Below we will go through the deployment process in 10 easy steps, assuming that your folder-structure looks like the below and you are currently in your /app directory and your virtual environment is still activated:
CreateRESTfulAPI/
  app/
    app.py
  virtual/
In case you are in the /app directory but your virtual environment is deactivated execute $ source ../virtual/bin/activate and your virtual environment should be activated again.
-
Execute
pip install gunicorn.gunicornis a Python WSGI HTTP Server and needed later by Heroku to be able to run our application. -
Execute
pip freeze > requirements.txtto create the filerequirements.txt- file that contains a list of all the python packages that are currently in your virtual installation. This file is necessary to tell ‘Heroku’ what to install in their system. -
Create a file called
Procilewithout an extension and writeweb: gunicorn app:appwhereby the first instance ofapprefers to the name of your fileapp.pyand the secondapprefers to the name of the variable holding the Flask instance. -
The last file we need is a file called
runtime.txtin which we have to write the version of python we want our app to run on. To specify the correct version, simply refer to the Heroku DevCenter that always lists the latest supported python distributions for Python 2 and 3. In our case, we writepython-3.6.4to our file. - Next, we have to log in to
herokufrom the command line ty executingheroku login. When asked type in your Email-address and password.$ heroku login Enter your Heroku credentials: Email: <your_email_address> Password: <your_password> Logged in as <your_email_address> -
We create a new app by executing
heroku create todo-api-tutorial. Note that you will have to use a different name becausetodo-api-tutorialwill already be taken by me unless I deleted this app again in the meantime and the name is free again. - Type the following sequence of commands that creates a local git repository, stages all files in the repository and commits all changes:
$ git init Initialized empty Git repository in .......................... $ git add . $ git commit -m "first commit" [master (root-commit) 77ab482] first commit 5 files changed, 287 insertions(+) create mode 100644 Procfile create mode 100644 app.py create mode 100644 requirements.txt create mode 100644 runtime.txt create mode 100644 tasks.txt -
We want to connect to our
todo-api-tutorialapp by executingheroku git:remote --app todo-api-tutorial. To check that the connection was successful runheroku info. - By running
git push heroku masterwill detect all the files that you created above, install all dependencies and packages specified inrequirements.txtand ultimately deploy the app. The entire deployment process should end withremote: Verifying deploy... done. To https://git.heroku.com/todo-api-tutorial.git * [new branch] master -> master - Now comes the big moment where we will check whether our deployed web service is now actually also retrievable. Executing the below
GETrequest in your command line should give you the following output:$ curl -u your_username:your_password http://todo-api-tutorial.herokuapp.com/todo/api/v1.0/tasks { "tasks": [ { "description": "Milk, Cheese, Pizza, Fruit, Tylenol", "done": false, "title": "Buy groceries", "uri": "http://todo-api-tutorial.herokuapp.com/todo/api/v1.0/tasks/1" }, { "description": "Need to find a good Python tutorial on the web", "done": false, "title": "Learn Python", "uri": "http://todo-api-tutorial.herokuapp.com/todo/api/v1.0/tasks/2" } ] }If so, congratulations!
In a similar fashion, you can add a task:
$ curl -u your_username:your_password -H "Content-Type: application/json" -X POST -d '{"title":"Read a book"}' http://todo-api-tutorial.herokuapp.com/todo/api/v1.0/tasks
{
  "task": {
    "description": "",
    "done": false,
    "id": 4,
    "title": "Read a book"
  }
}
and then again retrieve the newly updated list:
$ curl -u your_username:your_password http://todo-api-tutorial.herokuapp.com/todo/api/v1.0/tasks
{
  "tasks": [
    {
      "description": "Milk, Cheese, Pizza, Fruit, Tylenol",
      "done": false,
      "title": "Buy groceries",
      "uri": "http://todo-api-tutorial.herokuapp.com/todo/api/v1.0/tasks/1"
    },
    {
      "description": "Need to find a good Python tutorial on the web",
      "done": false,
      "title": "Learn Python",
      "uri": "http://todo-api-tutorial.herokuapp.com/todo/api/v1.0/tasks/2"
    },
    {
      "description": "",
      "done": false,
      "title": "Read a book",
      "uri": "http://todo-api-tutorial.herokuapp.com/todo/api/v1.0/tasks/3"
    }
  ]
}
-
Building on all of the above, a fairly neat explanation is given by Martin Gibbs where he states that APIs are a set of tools that programmers can use in helping them create software and thereby allow a programmer to deliver solid solutions fairly rapidly without having to rebuild everything from scratch every time. ↩
-
Note that depending on whether or not you already have it, there is a Chrome-extension called JSONView that nicely formats raw JSON-responses in the browser. Similar tools should also be available for other browsers. ↩
-
We could, for example, easily type
curl http://www.google.cominto our command-line and get back a whole mess of unstructured HTML that a browser would usually nicely render for us when we request http://www.google.com from the browser. In other words, web APIs are designed to return structured data (in XML or JSON) and not to respond with HTML. ↩ -
Note that although Ryan Mitchell declares that using APIs is generally not considered classical web scraping, he declares that both practices (of web scraping and using dedicated web APIs) make use of the same techniques and can often be very complementary to each other (p. 49). ↩
-
From the way Grinberg introduces APIs I would conclude that he already jumps into web APIs without dealing with other things that could represent an API. ↩
-
Although there are Flask extensions that would help with building a RESTful service using Flask, Miguel decides to continue his tutorial without extensions. ↩
-
Note that your terminal must be in the respective directory where your file
app.pyis located in order for the commandpython3 app.pyto start Flask’s local server. ↩